Crafting Your Perfect Keyboard: A Step-by-Step Guide Leave a comment
Are you tired of standard keyboards that don’t quite match your preferences? Building a custom keyboard might be the solution you’re looking for. From choosing components to assembly, follow our comprehensive guide to craft a keyboard tailored to your needs.
Introduction: The Art of Customization
Your keyboard is more than just a tool; it’s an extension of your personality and workflow. Building a custom keyboard allows you to fine-tune every aspect, from the tactile feel of the keys to the aesthetics that adorn your workspace. Whether you’re a seasoned enthusiast or a curious beginner, embarking on this DIY journey promises a rewarding experience.
1. Gather Your Components
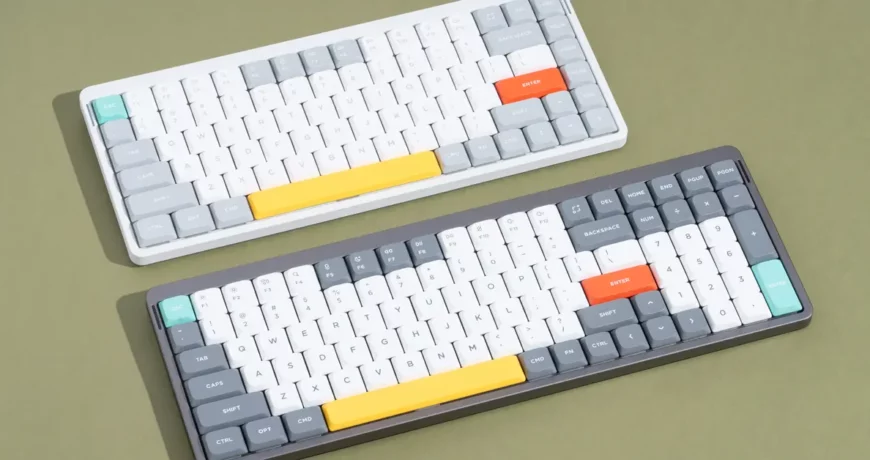
The first step in building your custom keyboard is selecting the right components. Decide on the type of switches you prefer—mechanical switches offer a satisfying tactile feedback, while optical switches provide a smoother keystroke. Choose a keyboard case that complements your style, whether it’s sleek aluminum or vibrant acrylic. Don’t forget keycaps; they’re not just for aesthetics but also influence the typing experience.
2. Assemble Your Keyboard
Once you have all your components, it’s time to bring your keyboard to life. Start by mounting the switches onto the keyboard PCB (printed circuit board). Take care to align them properly to ensure consistent keypresses. Then, secure the PCB and switches into the keyboard case, making sure everything fits snugly. Finally, install the keycaps, paying attention to their orientation and layout.
3. Customize Your Layout
One of the joys of building a custom keyboard is the ability to personalize your layout. Experiment with different keycap profiles, colors, and designs to create a keyboard that reflects your unique style. Consider programming macros or shortcuts to streamline your workflow further. The possibilities are endless, so don’t be afraid to get creative.
4. Test and Refine
Once your keyboard is assembled, it’s time to put it to the test. Type away to ensure that all keys register correctly and that there are no issues with the switches or PCB. Take the time to fine-tune any adjustments, such as switch alignment or stabilizer lubrication, to optimize your typing experience further. Remember, building a custom keyboard is a process of iteration and refinement.
Conclusion: Your Custom Creations Await
Congratulations! You’ve successfully built your custom keyboard—a testament to your creativity and craftsmanship. Whether you’re typing up a storm or gaming into the night, your personalized keyboard is there to support you every step of the way. Embrace the satisfaction of creating something truly unique and make your keyboard the envy of your peers.
Ready to embark on your custom keyboard journey? Explore Storegrill’s collection of keyboard components and accessories, and unleash your creativity today. With our step-by-step guide and quality products, crafting your perfect keyboard has never been easier. Let your imagination run wild and build the keyboard of your dreams with Storegrill.
| Title | Price | Product Image | Stock | Action |
|---|---|---|---|---|
| Asus AC01 ROG Gaming Wrist Rest, Black, 370 x 75 x 21mm | £24.36 |  | 56 in stock | |
| Asus CB02 TUF Gaming Combo RGB Desktop Kit - TUF K1 RGB Keyboard & TUF M3 RGB Mouse, Aura Sync | £77.99 |  | 77 in stock | |
| Asus ROG AZOTH Compact 75% Mechanical RGB Gaming Keyboard, Wireless/Btooth/USB, Hot-Swap ROG NX Red Switches, OLED Display, Control Knob, Mac Support | £263.24 |  | 51 in stock | |
| Asus ROG AZOTH Compact 75% Mechanical RGB Gaming Keyboard, Wireless/Btooth/USB, Hot-Swap ROG NX Snow Switches, OLED Display, Control Knob, Mac Support | £263.24 |  | 13 in stock | |
| Asus ROG CLAYMORE II RGB Mechanical Gaming Keyboard w/ PBT Keycaps, Wired/Wireless, RX Red Mechanical Switches, Fully Programmable Keys, Detachable Numpad & Wrist Rest | £233.99 |  | 13 in stock |